Why Filing Claims Properly Matters
Dealing with unexpected events while traveling is stressful enough—waiting on a slow insurance reimbursement can make it even tougher. That’s why understanding the basics of how to file a travel insurance claim is such a practical skill for any traveler. When you know the steps in advance, you’re much less likely to get stuck in endless back-and-forth with your insurance provider.
Having your documents in order from the moment you start your trip can significantly cut down on delays if something happens. In my experience, organizing key paperwork before you travel means you aren’t scrambling to find receipts, confirmations, or that all-important policy number later. I’ve learned that having all documents organized beforehand really helps me avoid delays. Being proactive with your prep doesn’t just speed up the process—it can reduce your stress when you’re already dealing with trip interruptions, lost luggage, or other issues.
Planning ahead for claims means knowing which documents to keep: receipts for any extra expenses, proof of trip payments, emails or paperwork showing disruptions, and your policy details. If you’re still shopping for insurance, you’ll find it straightforward to compare different options on the airtkt.com travel insurance options page. That way, you can choose a policy with coverage that matches your destinations and style of travel right from the start.
Essential Documents Needed to File Claims

Submitting a travel insurance claim can feel overwhelming, but gathering the right paperwork upfront makes the process much smoother. Insurers aren’t just checking boxes—they need each document to verify what happened, who it affected, and what expenses you’re actually claiming. I always double-check each document to make sure nothing is missing before submitting, because one missing page can delay the whole process.
Policy Information Matters Most
Your insurance policy number, the purchased plan, and your contact details are often the first things required. This proves you’re eligible and helps the company quickly locate your coverage. If you’re unsure where to find your details, your insurer’s welcome email or member portal should have them clearly listed.
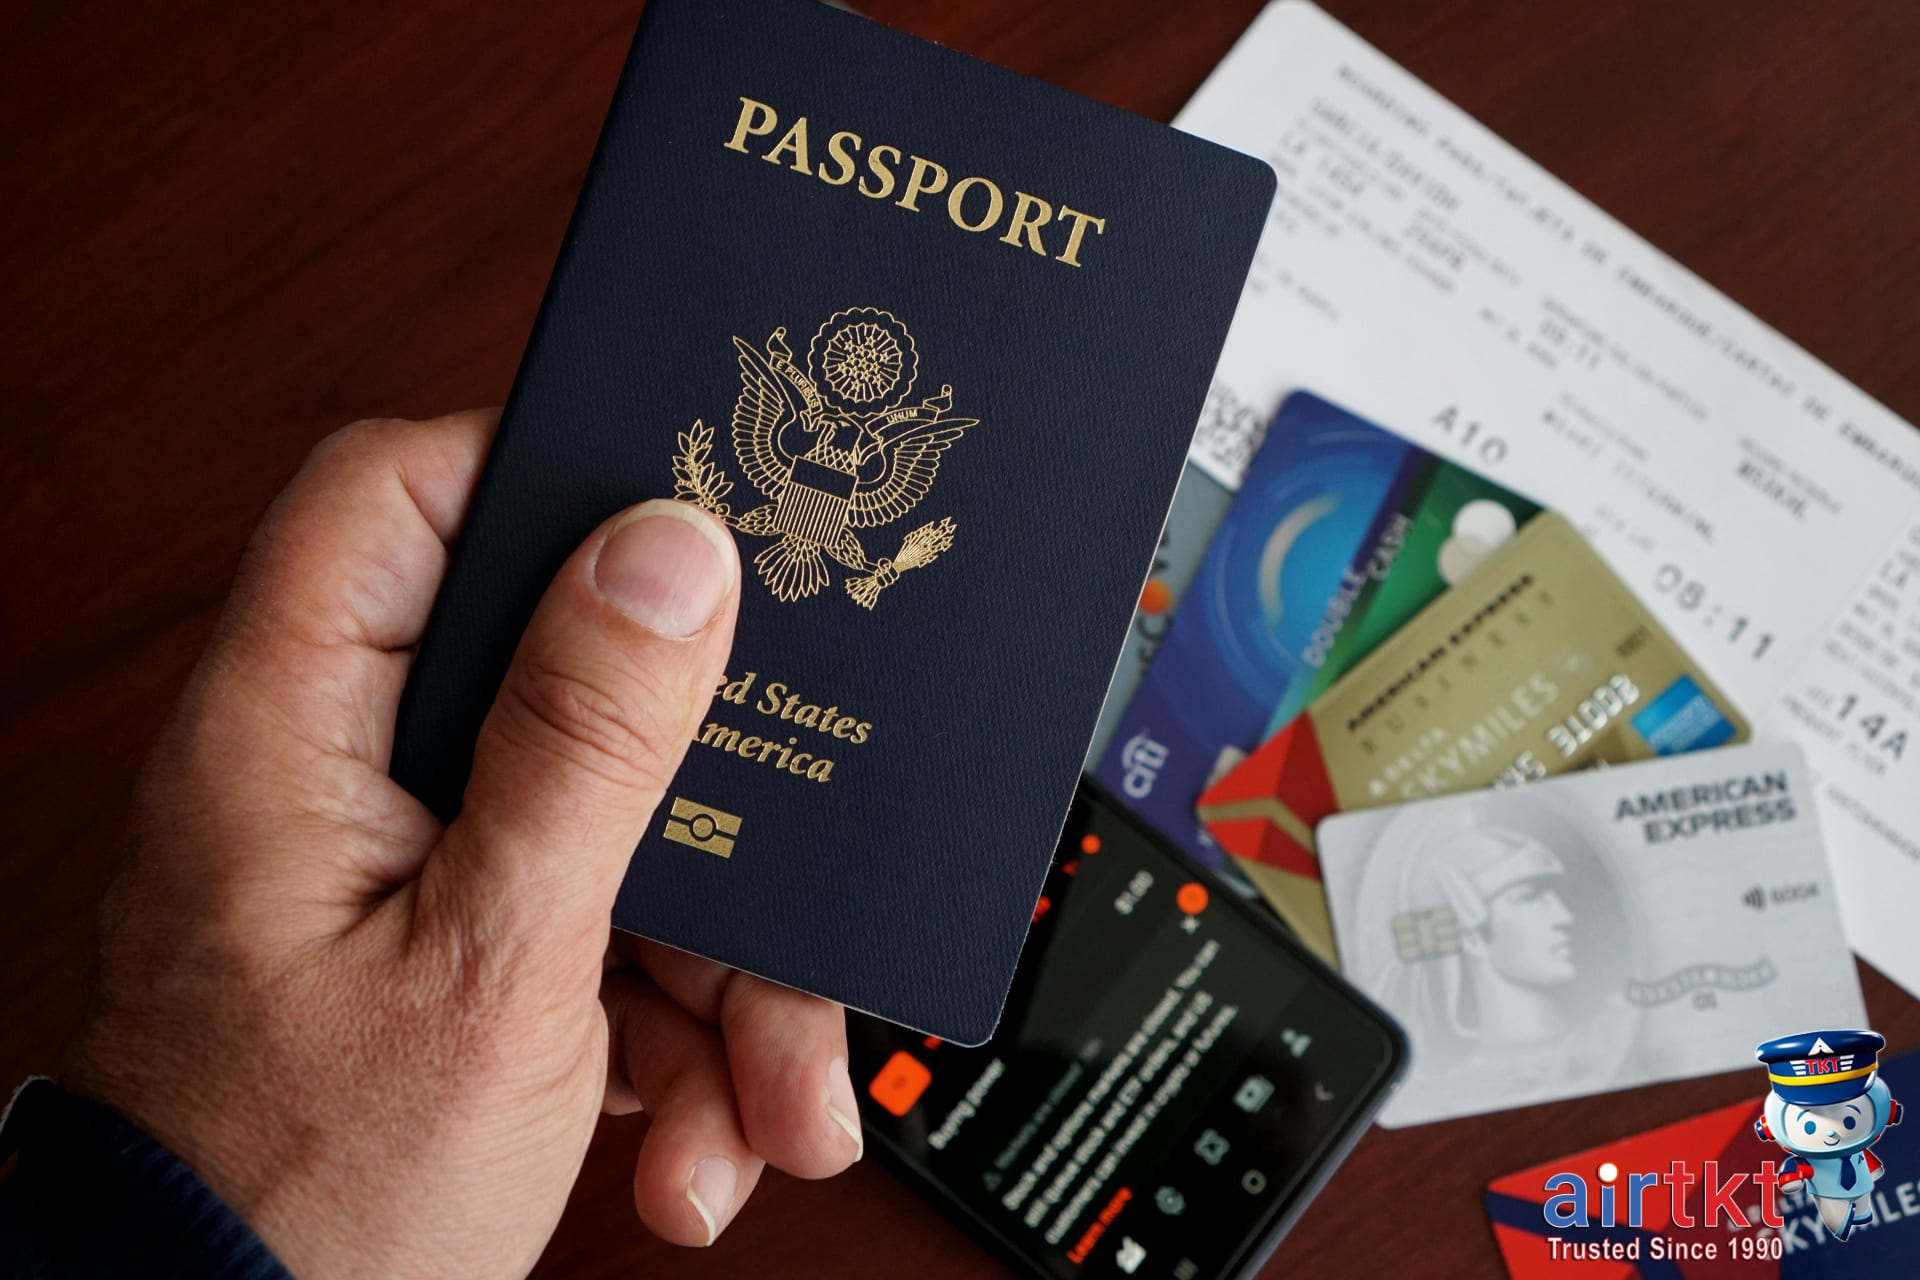
Proof of Travel: Booking Confirmations
You’ll need to show you actually traveled or planned to travel. A flight itinerary, hotel booking, or a screenshot of your airtkt.com booking confirmation page counts as solid proof of travel during the claim period. Insurers use this to match your coverage with your actual trip dates and destination.
Receipts and Invoices for Expenses
Insurers want original receipts or clear copies for every cost you claim—lost luggage, medical bills, extra accommodations, meals, or replacement items. Each receipt ties your claim to a concrete financial loss. Don’t forget to check your emails for digital receipts, especially with prepaid services.
Medical Documentation
If you’re filing for accident or illness, attach all medical reports, doctor’s notes, and hospital discharge papers. These prove the nature, date, and severity of your illness or injury. If you’re prescribed medication or had to cancel activities, be sure reports clearly explain those needs.
Proof of Incident: Police or Official Reports
For theft, loss, or legal incidents, police reports are nearly always required. Reported flight delays or cancellations need an official airline notice—this could be an email or airport-issued slip. Photos of damaged items, injury, or lost property can bolster your claim and show clear evidence of what happened.
Staying organized from the start saves time later on. Make a checklist and file copies of everything in one digital folder—it’s a little extra work, but it speeds up approval if you ever need to file again.
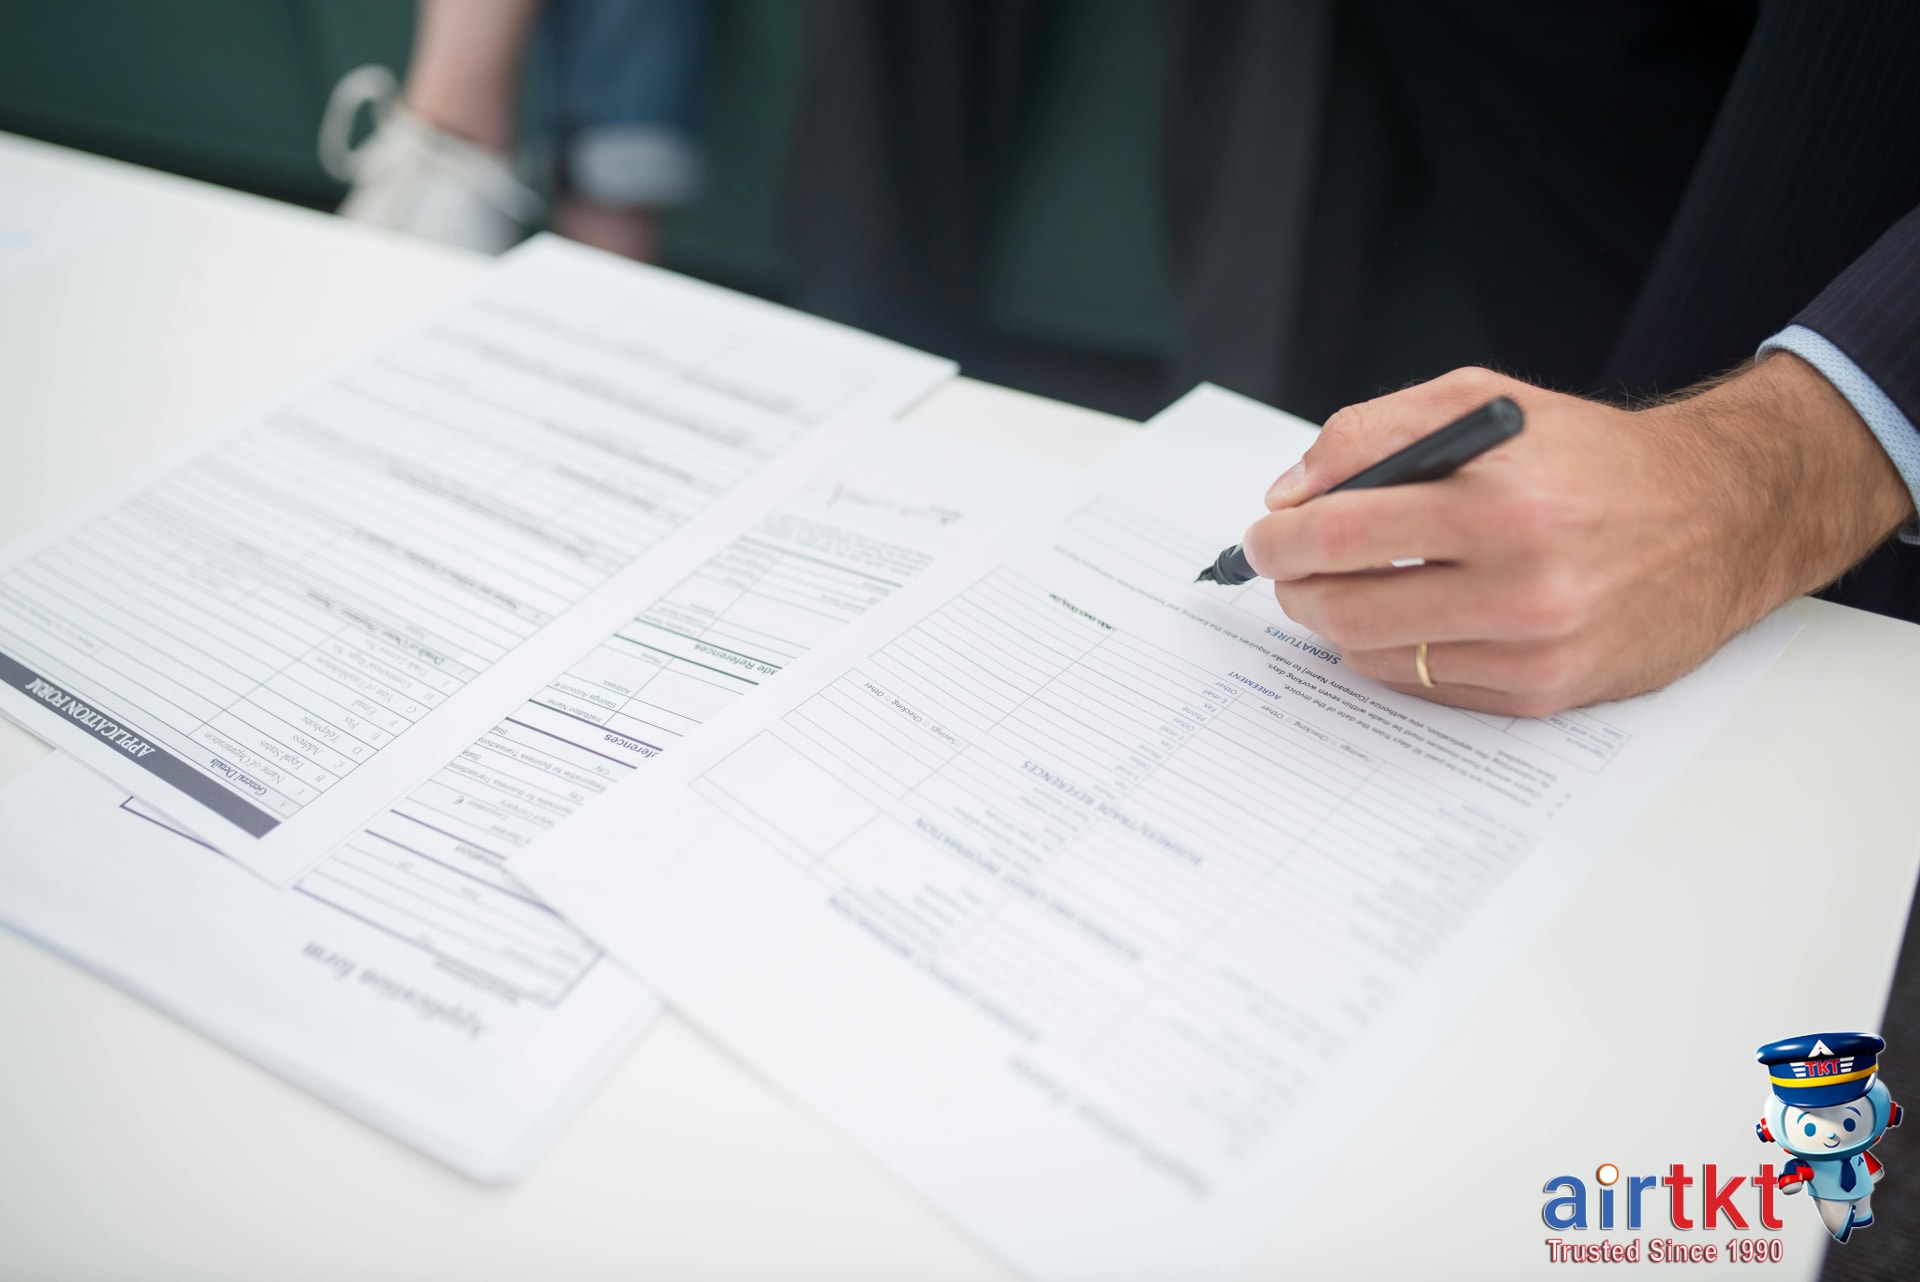
How to Submit Your Travel Insurance Claim
Filing a travel insurance claim can feel daunting, but breaking the process into clear steps helps avoid mistakes that could slow things down or get your claim denied. Here’s a straightforward process I rely on—I’m always cautious to follow each step carefully to avoid claim rejection.
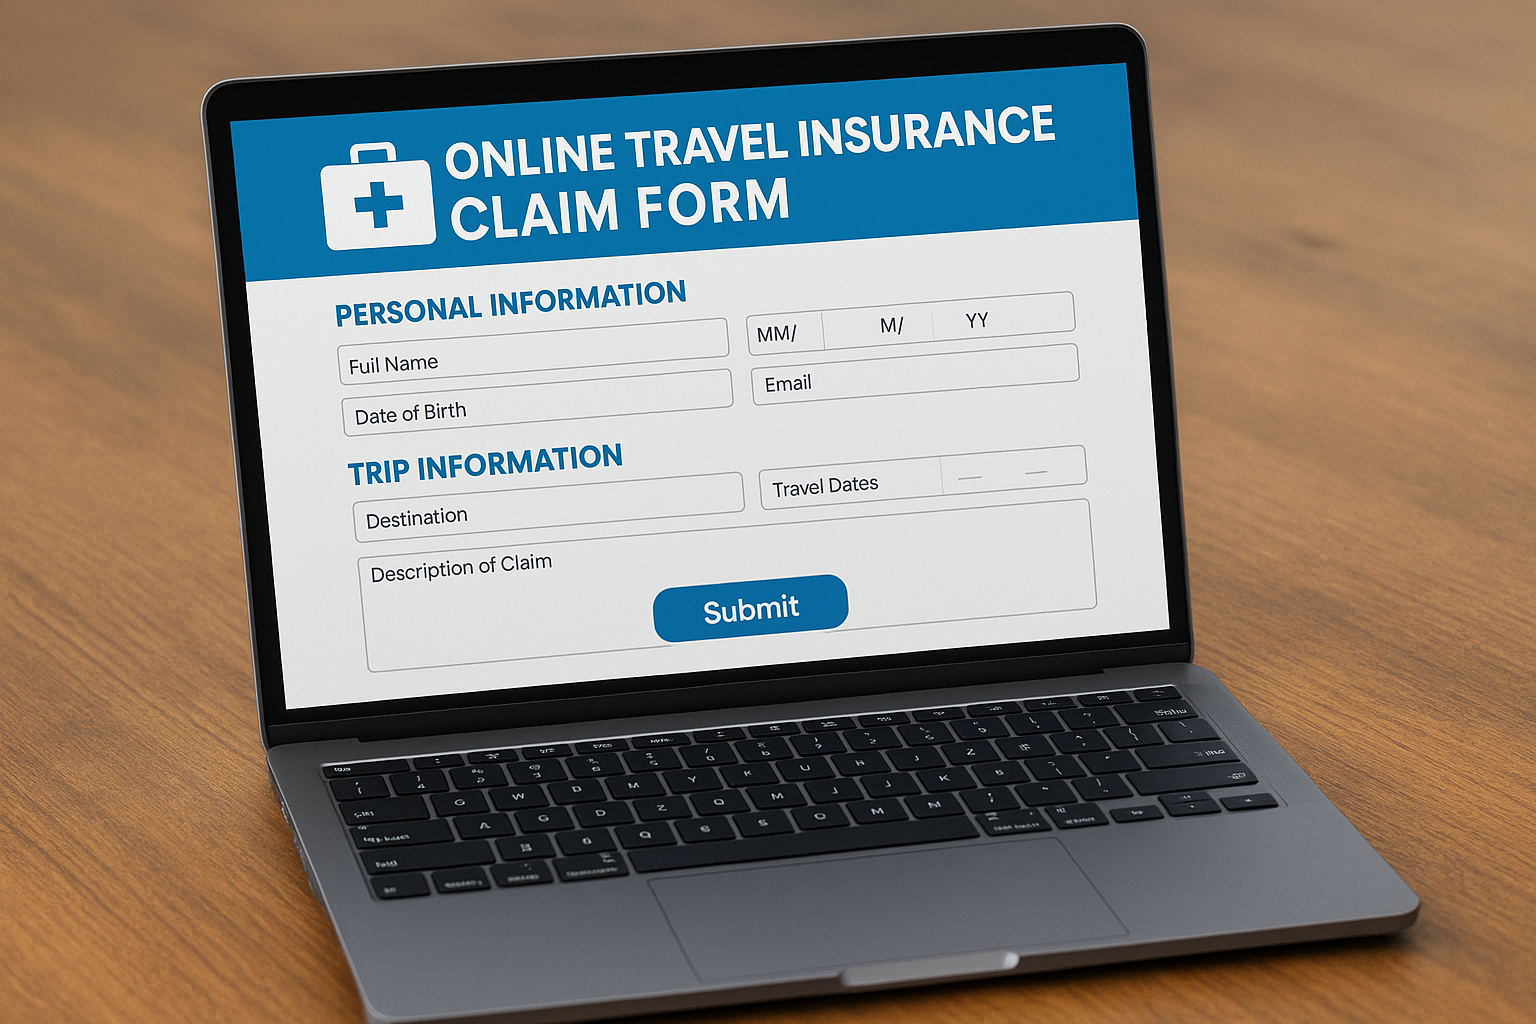
Step 1: Pick Your Submission Method
Insurance providers usually let you submit claims through multiple channels—online portals, dedicated email addresses, or by phone. Online forms are often the fastest and offer upload options for your documents, but some travelers prefer email or a phone call for more personal support. Before starting, check your insurer’s website for their current claim submission options.
Step 2: Follow Carrier Instructions Exactly
Each insurance company has slightly different requirements. Download their claim form (or complete it online), carefully read through all instructions, and fill in every section. Missing details or uploading the wrong document type is a leading cause of claim processing delays. I’ve found that following the carrier’s checklist helps keep things organized.
Step 3: Submit Forms and Documents
Along with your completed claim form, attach required supporting documents—think receipts, medical reports, proof of travel interruption, and copies of your policy and ID. Confirm that your documents are clear and legible. Double-check everything for accuracy before you hit submit or send. In my experience, re-checking forms here saves major headaches later.
Step 4: Save Your Reference Number
Once you submit, you should receive a claim reference or case number, either onscreen, by email, or when speaking with a representative. Write this down immediately—having your reference helps track status, speeds up follow-ups, and proves you made a timely submission. Be sure you also record the correct contact information for claim status inquiries.
If you ever feel confused by your insurer’s process, you can always reach out to airtkt.com customer service for extra guidance on getting your travel insurance claim submitted correctly.
Tracking and Following Up on Claims

Once you’ve submitted your travel insurance claim, waiting for updates can feel like a bit of a test in patience. Most claims typically take a few weeks to process, but this timeline can shift depending on the complexity of your case, the provider’s workload, or if they need additional documents. In my experience, the single biggest factor that delays a claim is missing paperwork—something that’s easier to avoid if you keep all your documentation in one place from the start.
Providers often let you track your claim status through their online portal—just log in and look for the claims section. Some companies also offer phone support or accept status updates via email. If you haven’t received an update after a week or two, logging into your account is generally the fastest way to see if the claim is moving forward or if a representative has left a note or follow-up request. I usually set reminders to check my claim status every week until it’s resolved, which helps me stay organized and proactive without letting too much time slip by.
If your claim is still pending a week after your last check, go ahead and reach out. Calling can be more time-consuming, but it sometimes gets you answers faster, especially if you need clarification about what’s causing a delay. When you do contact the provider, always reference your claim number and jot down the date and the name of the representative you spoke to. This habit saves time in future follow-ups and gives you a paper trail in case any details get mixed up later.
Staying organized and checking in regularly helps you avoid common pitfalls like missed emails or forgotten updates. If you set up a simple system from the start and keep steady tabs on your claim, the process is usually less stressful—even if you have to give it a little nudge now and then.
Preventing Delays and Common Mistakes

If you want your travel claim to go smoothly, it’s important to avoid some surprisingly common slip-ups. Many travelers run into trouble by missing vital documents, submitting their claims late, using the wrong forms, or writing vague explanations about what happened. In my experience, the most frequent cause of a delayed claim is simply missing a deadline—I’ve found that submitting claims promptly avoids the most common setbacks.
Here’s where problems usually start: you’re missing receipts, you forget to include a required letter, or you use an out-of-date form provided by the insurer or airline. Even if you have every piece of paperwork, you can still run into delays if your explanation isn’t clear or you skip sections of the form. If the claims processor can’t understand your situation at a glance, they often come back with follow-up questions—dragging out the process even longer.
Thankfully, a little attention at the start goes a long way. Carefully read all instructions for your claim, and double-check that you have every supporting document ready before you submit. As soon as a qualifying incident occurs, gather evidence such as receipts or tickets, and take notes while details are fresh. I recommend filing as soon as possible—acting quickly helped me resolve a lost baggage claim that might have languished in the system had I waited. If you’re unsure about what documents or forms are needed, check the official website or contact customer service before sending anything.
Setting reminders is a lifesaver, especially if you’re still traveling and might lose track of dates. And before you submit, review all your documents for accuracy and completeness—you want everything as clear as possible to avoid questions later. For general travel preparedness advice that can help you stay organized, I suggest browsing the helpful tips on the airtkt.com travel tips blog.
Budgeting Your Travel Insurance Claim
Most trips don’t go exactly as planned, so understanding how to budget your travel insurance claim can make a real difference. If your luggage goes missing, a flight gets delayed, or your plans change, you’ll likely need to pay out of pocket before you’re reimbursed. Having a budget for these claim-related expenses helps you keep control of your trip costs and makes it much easier to plan ahead or recover financially after a setback. Personally, I find that budgeting claim-related expenses helps me plan trips without worry—and it takes some of the sting out of unexpected hiccups.

Sample Claim Budget Breakdown
Below is a table covering estimated expenses you may incur while waiting for your claim reimbursement. These amounts reflect a typical night’s stay, daily meals, getting around town, and a modest activity—for three budget styles. Of course, actual reimbursement will depend on the specifics of your travel insurance policy and what receipts get approved, but this framework gives you a practical starting point when planning.
| Accommodation | Food | Transport | Activities | |
|---|---|---|---|---|
| Budget | $50.00 | $20.00 | $15.00 | $10.00 |
| Mid-range | $100.00 | $40.00 | $30.00 | $25.00 |
| Luxury | $250.00 | $80.00 | $60.00 | $60.00 |
Keeping a simple chart like this handy can help you estimate how much you might need to spend temporarily, and clarify what you hope to recover from your insurance provider. If you use a platform like airtkt.com for booking flights or hotels, keeping these numbers in mind as you make choices could also help streamline reimbursement later.
Frequently Asked Questions About Travel Insurance Claims
- How do I file a travel insurance claim?
To file a travel insurance claim, gather all relevant documentation such as receipts and itineraries. Contact your insurer directly, usually through their website, app, or phone. Complete the claim form accurately and submit supporting documents. Keep copies of everything you send in case you need to follow up on your claim’s status later.
- What documents do I need for a travel insurance claim?
Insurers typically require your policy number, receipts for expenses, canceled tickets, proof of travel interruption, and sometimes a medical report or police statement. Always include any emails, confirmations, or communications related to your claim. Missing documents often delay processing, so double-check requirements before sending your claim package.
- How long does a travel insurance claim take?
The processing time for a travel insurance claim can vary, but many providers aim to resolve claims within several weeks. Delays are most often caused by incomplete forms or missing documents. Make sure everything is included and legible for a smoother process. If you don’t hear back, follow up with your insurer promptly.
- Can I file a travel insurance claim after returning home?
Yes, you can usually file a travel insurance claim after returning home, but be aware of the deadline specified in your policy. Many insurers require claims to be started within a set number of days after your trip or incident. Check your plan’s terms and gather receipts and documentation as soon as you’re able.
- What expenses are typically covered by travel insurance claims?
Travel insurance claims often cover expenses like trip cancellations, emergency medical treatment, lost luggage, and interrupted travel. Some may also include delayed flights, stolen belongings, or additional accommodation charges. It’s always important to review your individual policy since coverage varies based on your selected plan’s terms and conditions.
- Are pre-existing conditions covered by travel insurance claims?
Coverage for pre-existing conditions depends on your policy and when you purchased it. Many standard plans don’t automatically include pre-existing medical conditions, but some providers offer waivers if you buy the insurance soon after booking your trip. Review your plan and contact your provider if you’re unsure about specific health coverage details.
Maximizing Your Claim Success
Wrapping up, it’s clear that a little organization goes a long way when it comes to travel insurance claims. Submitting your paperwork promptly, keeping records in order, and staying proactive about follow-ups can make the entire process much smoother. I’ve realized that staying organized and proactive pays off in faster claim reimbursement, and it really minimizes unnecessary back-and-forth with insurance providers.
Even after your claim is settled, it’s wise to keep all receipts and communication handy—just in case you need them down the road for future claims or unexpected questions. And if you’re planning your next trip, it doesn’t hurt to explore travel insurance options while booking. The airtkt.com platform makes it easy to look for insurance solutions alongside your flights and accommodations, which can save you time and give you added peace of mind.
Travel can be unpredictable, but by staying organized and acting quickly, you give yourself the best shot at smooth, worry-free claim experiences in the future.