Capture Travel Memories Creatively
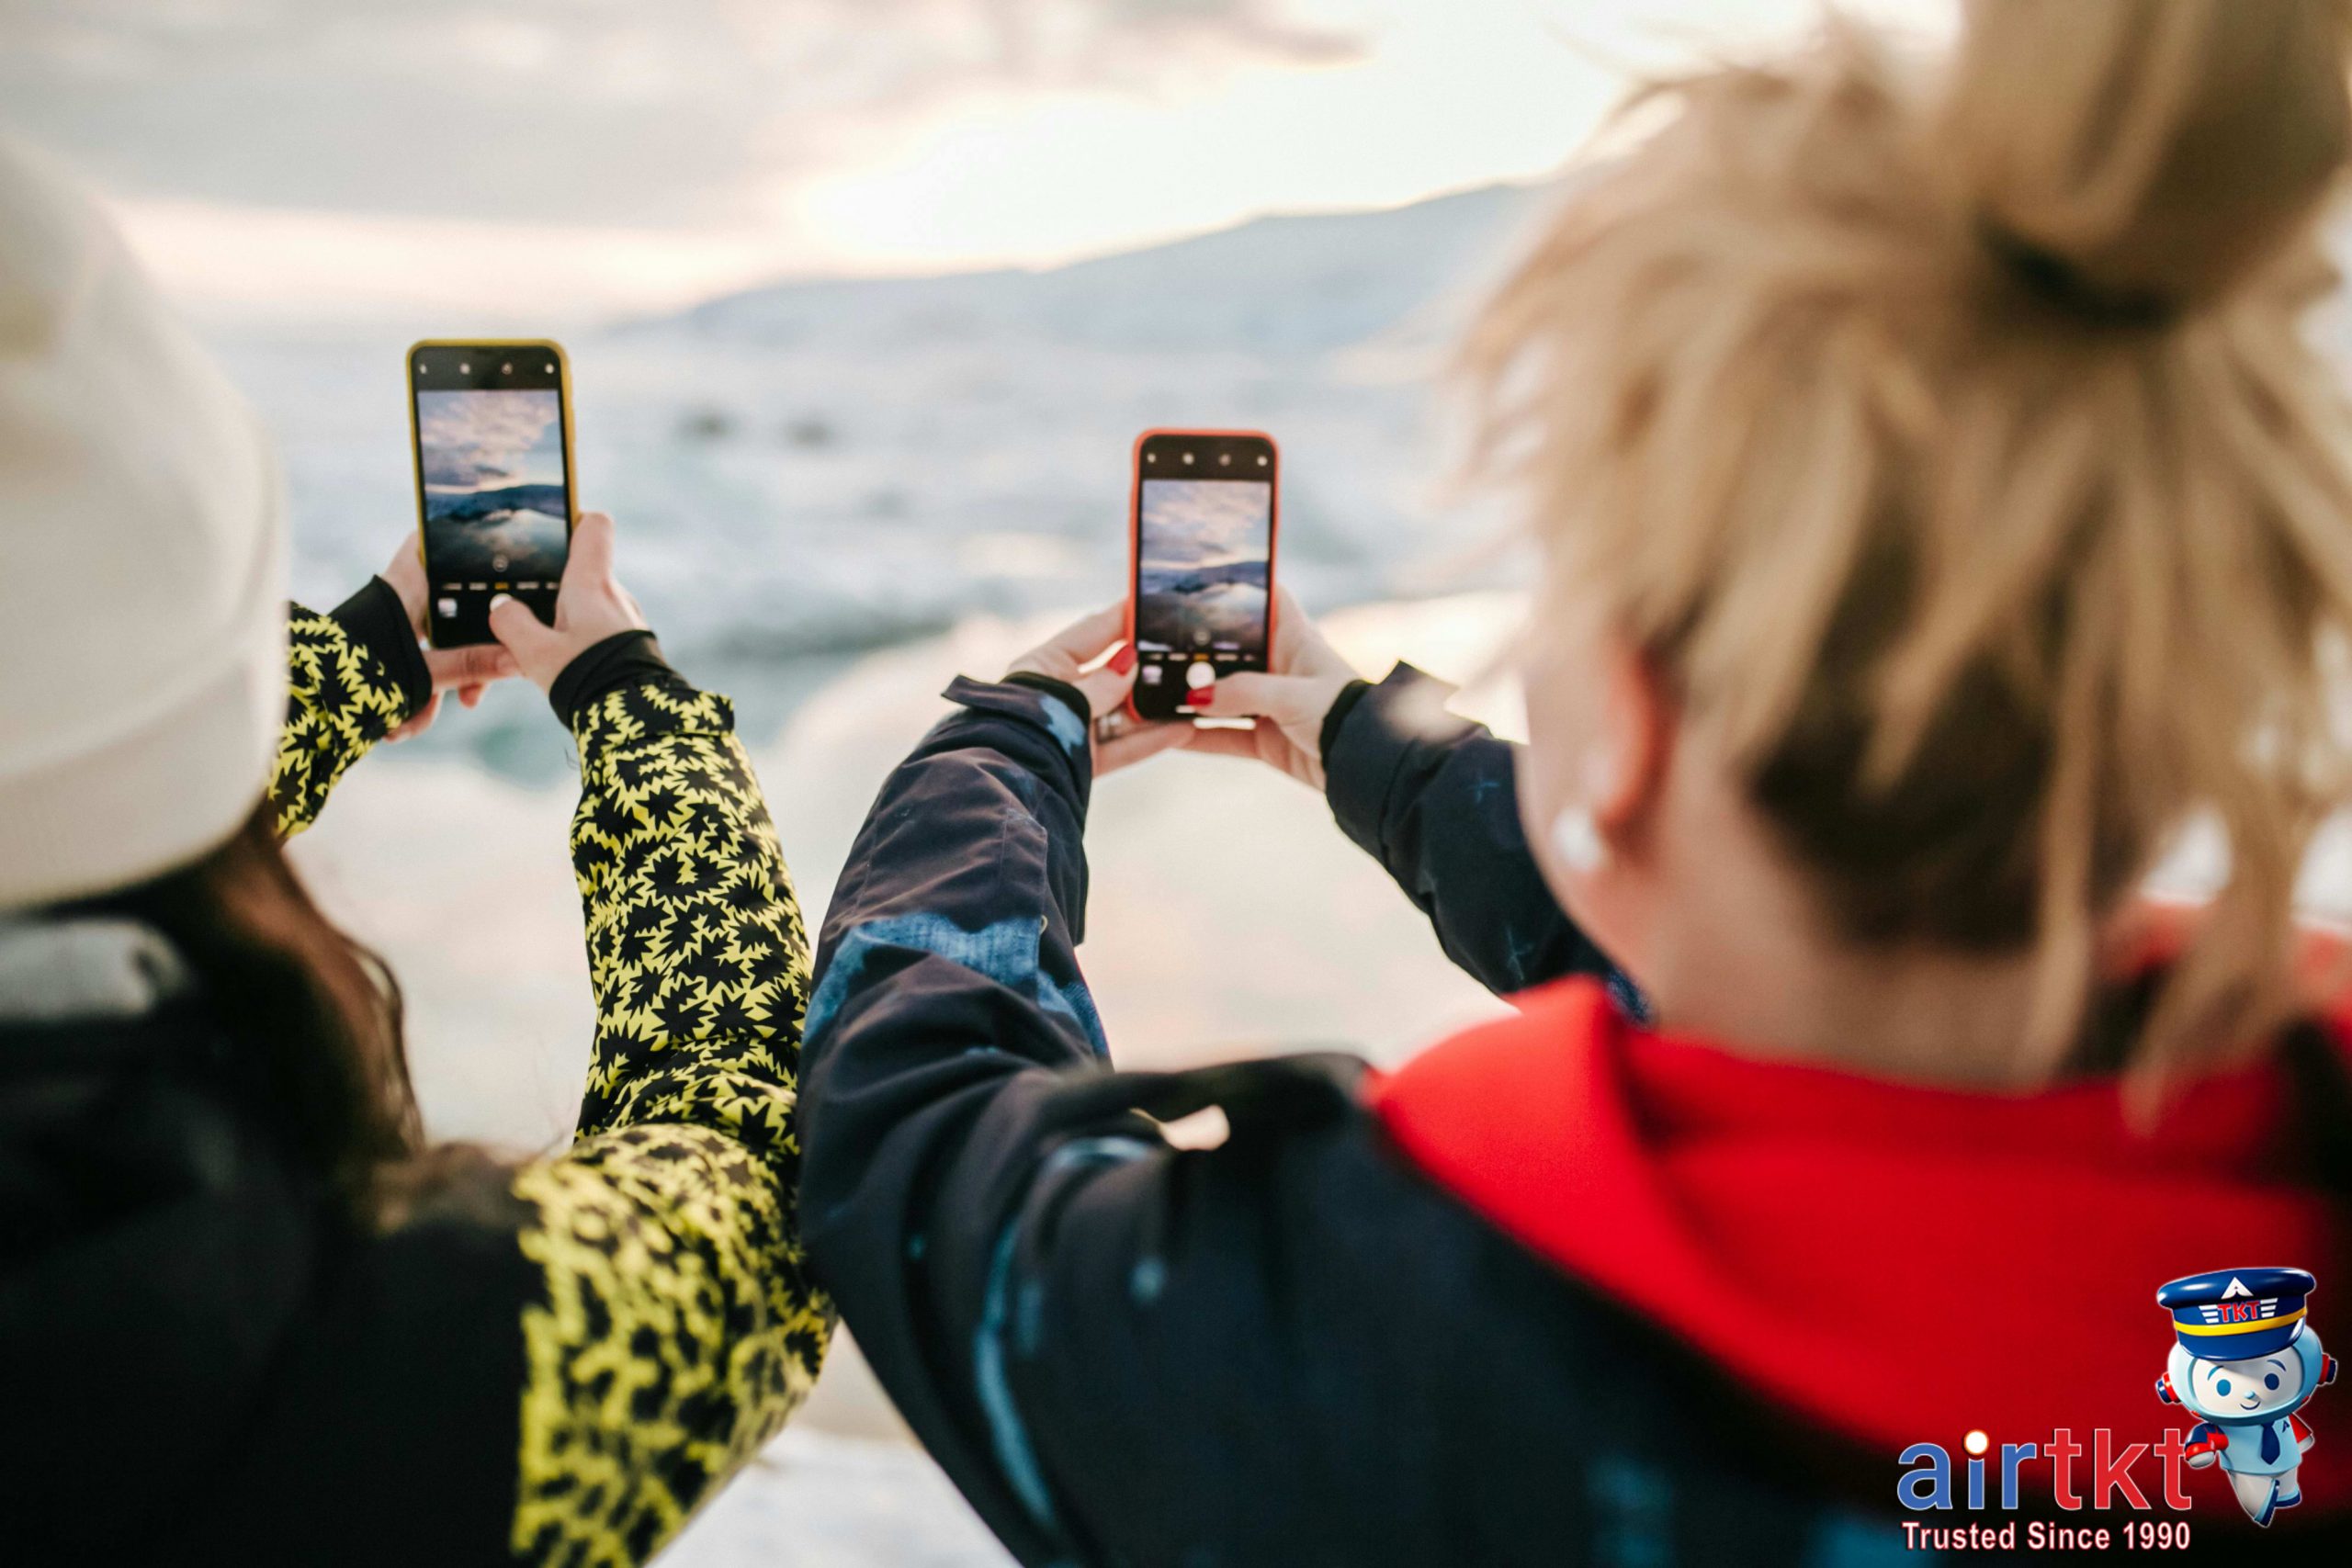
Travel photography is far more than snapping random pictures; it’s an essential way to preserve meaningful memories and tell your unique story. Unlike generic selfies, which often repeat the same angles and expressions, creative travel photos capture the spirit, culture, and emotion of a place. A well-composed image can instantly transport you back to a bustling market, a serene mountain view, or the warmth of local smiles long after your trip ends.
In today’s digital age, capturing these moments creatively is easier and more accessible than ever. Modern smartphones boast powerful cameras capable of stunning photos without complicated settings. For travelers interested in stepping up their game, entry-level DSLRs and mirrorless cameras offer beginner-friendly features that bring professional-quality results within reach. Whether you’re snapping with a phone or a dedicated camera, the tools to capture authentic travel experiences are at your fingertips.
Embracing creativity in your travel photography encourages you to look beyond standard shots and experiment with perspectives, lighting, and composition. This approach transforms simple snapshots into evocative memories that tell a story only you can share. Think of your camera as a passport to discovery and personal expression during your adventures.
In the upcoming sections, we will explore practical tips and techniques to help you elevate your travel photos. From mastering natural light to framing your shots with intention, these insights will empower you to capture the essence of every destination beautifully. Whether you’re a casual traveler or aspiring photographer, AirTtkt is here to support you with travel deals that make your journey possible—and memorable.
Apply Rule of Thirds for Better Composition
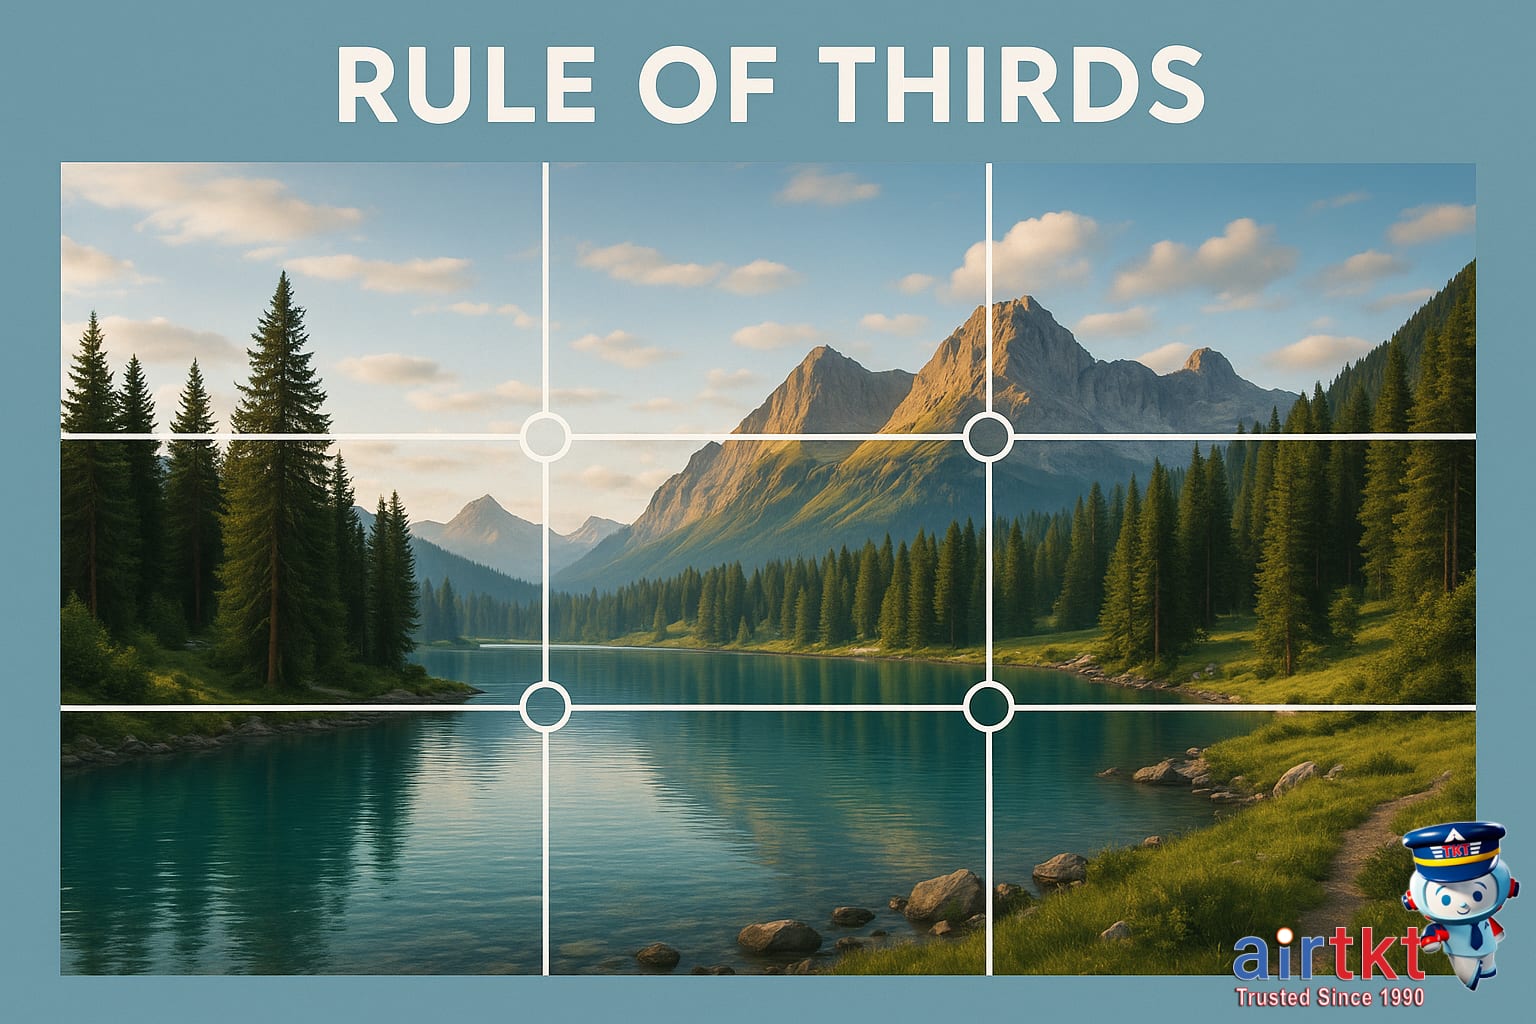
The rule of thirds is a time-tested photography principle that enhances the balance and visual appeal of photos. Originating from classical art theory, it dates back to the 18th century, with artists and photographers alike using it to guide eye movement and create harmonious compositions. By splitting an image into strategic zones, the rule of thirds helps avoid dull, centered shots and adds dynamic interest to your travel photos.
To apply the rule of thirds, imagine your camera frame divided into nine equal sections by two equally spaced vertical and two horizontal lines. These lines form a grid, creating four intersection points where the key elements of your photo should ideally be placed. Positioning subjects along these lines or their intersections naturally draws the viewer’s eye and provides a balanced frame without clutter.
For example, when capturing a landscape, place the horizon along the top or bottom horizontal line rather than dead center. This emphasizes either the sky or the foreground, creating depth and drama. Similarly, for portraits, align the subject’s eyes near an upper intersection rather than centering the face. Off-center positioning conveys movement and emotion, while common centering mistakes can make images feel static and flat.
Most smartphones offer a grid overlay option in their camera settings to help visualize the rule of thirds while shooting. On iPhones and Androids, enabling this grid is just a toggle away in camera preferences, making it easier to frame shots intuitively. DSLR and mirrorless cameras typically include a similar grid in the electronic viewfinder or live view mode; consult your camera manual to activate this feature.
As you practice, try composing your shots by aligning natural elements—like trees, buildings, or waves—along the grid lines. This method consistently results in more engaging photos with a professional look. Whether using a smartphone or DSLR, the rule of thirds turns simple travel snapshots into captivating images.
Use Natural Light During Golden Hour
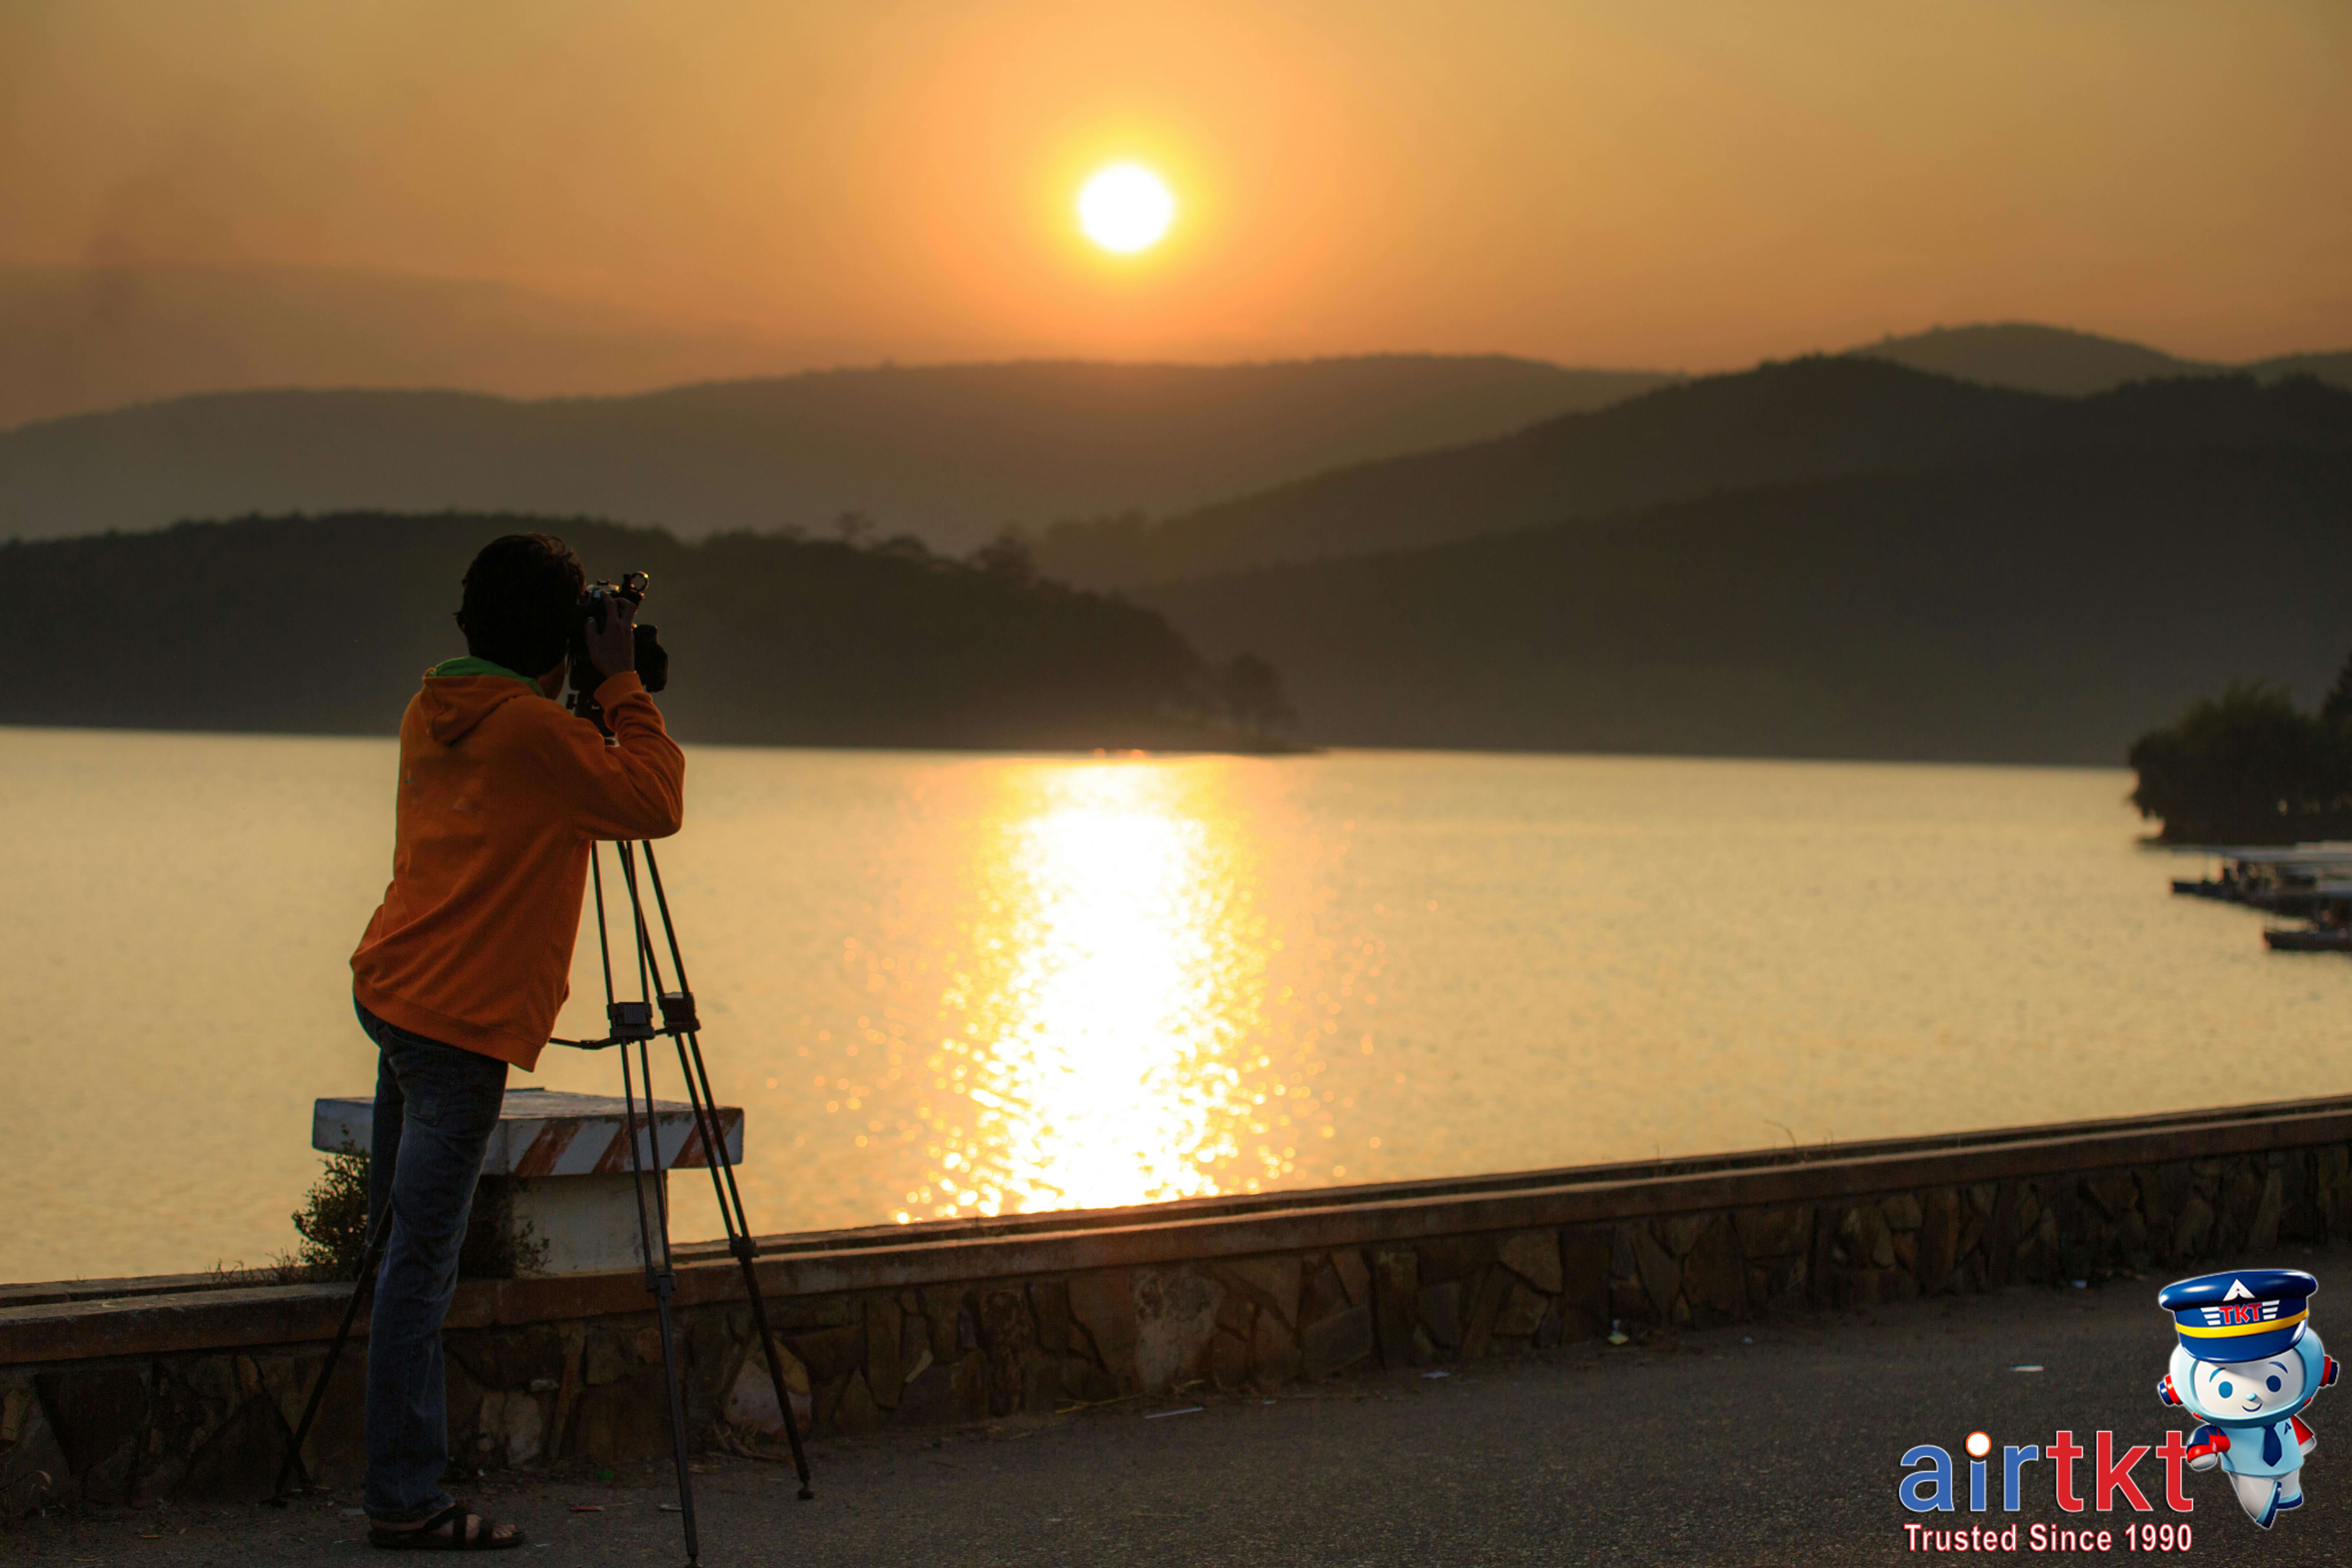
Capturing the perfect travel photo often hinges on lighting, and few moments offer more flattering illumination than the golden hour and blue hour. The golden hour occurs shortly after sunrise and just before sunset, lasting about an hour, when sunlight takes on a warm, soft glow. Blue hour follows just before sunrise and after sunset, casting a cooler, ethereal light that beautifully enhances landscapes and cityscapes alike.
These times are favored by photographers because the sunlight is diffused and gentle, casting long shadows that add depth while minimizing harsh contrasts and overexposed highlights. The warm tones during golden hour naturally enrich colors, lending a cinematic quality and emotional warmth to images without the need for post-processing. Meanwhile, blue hour’s cooler palette beautifully complements reflective surfaces, including water and glass, making it ideal for moody or tranquil shots.
It’s important to note that the exact timing of these magical hours shifts significantly with latitude and season. Near the equator, golden hour tends to be brief and consistent year-round, while higher latitudes experience longer golden hours in summer and shorter ones in winter. Checking local sunrise and sunset times using apps or weather websites ensures you plan your shoots precisely. This nuance allows you to maximize your travel photography by aligning your outings with optimal light conditions.
- Plan morning shoots soon after sunrise to capture fresh light and avoid crowds at popular sites.
- Evening sessions before sunset offer rich, warm colors and the chance to catch twilight moods.
- Adjust schedules based on seasonal changes: longer golden hours in summer, quicker transitions in winter.
Several iconic travel destinations are renowned for their stunning golden hour opportunities. Santorini’s whitewashed buildings glow vividly during sunset, the Sahara Desert ripples with golden hues at dawn, and Japan’s cherry blossoms are enchanting when bathed in soft morning light. Whether urban skylines or natural wonders, timing your photos at golden or blue hour can transform ordinary scenes into extraordinary memories.
For travelers eager to dive deeper into mastering golden hour photography, National Geographic’s golden hour tips offer expert guidance on how to best use this natural light to elevate your travel shots.
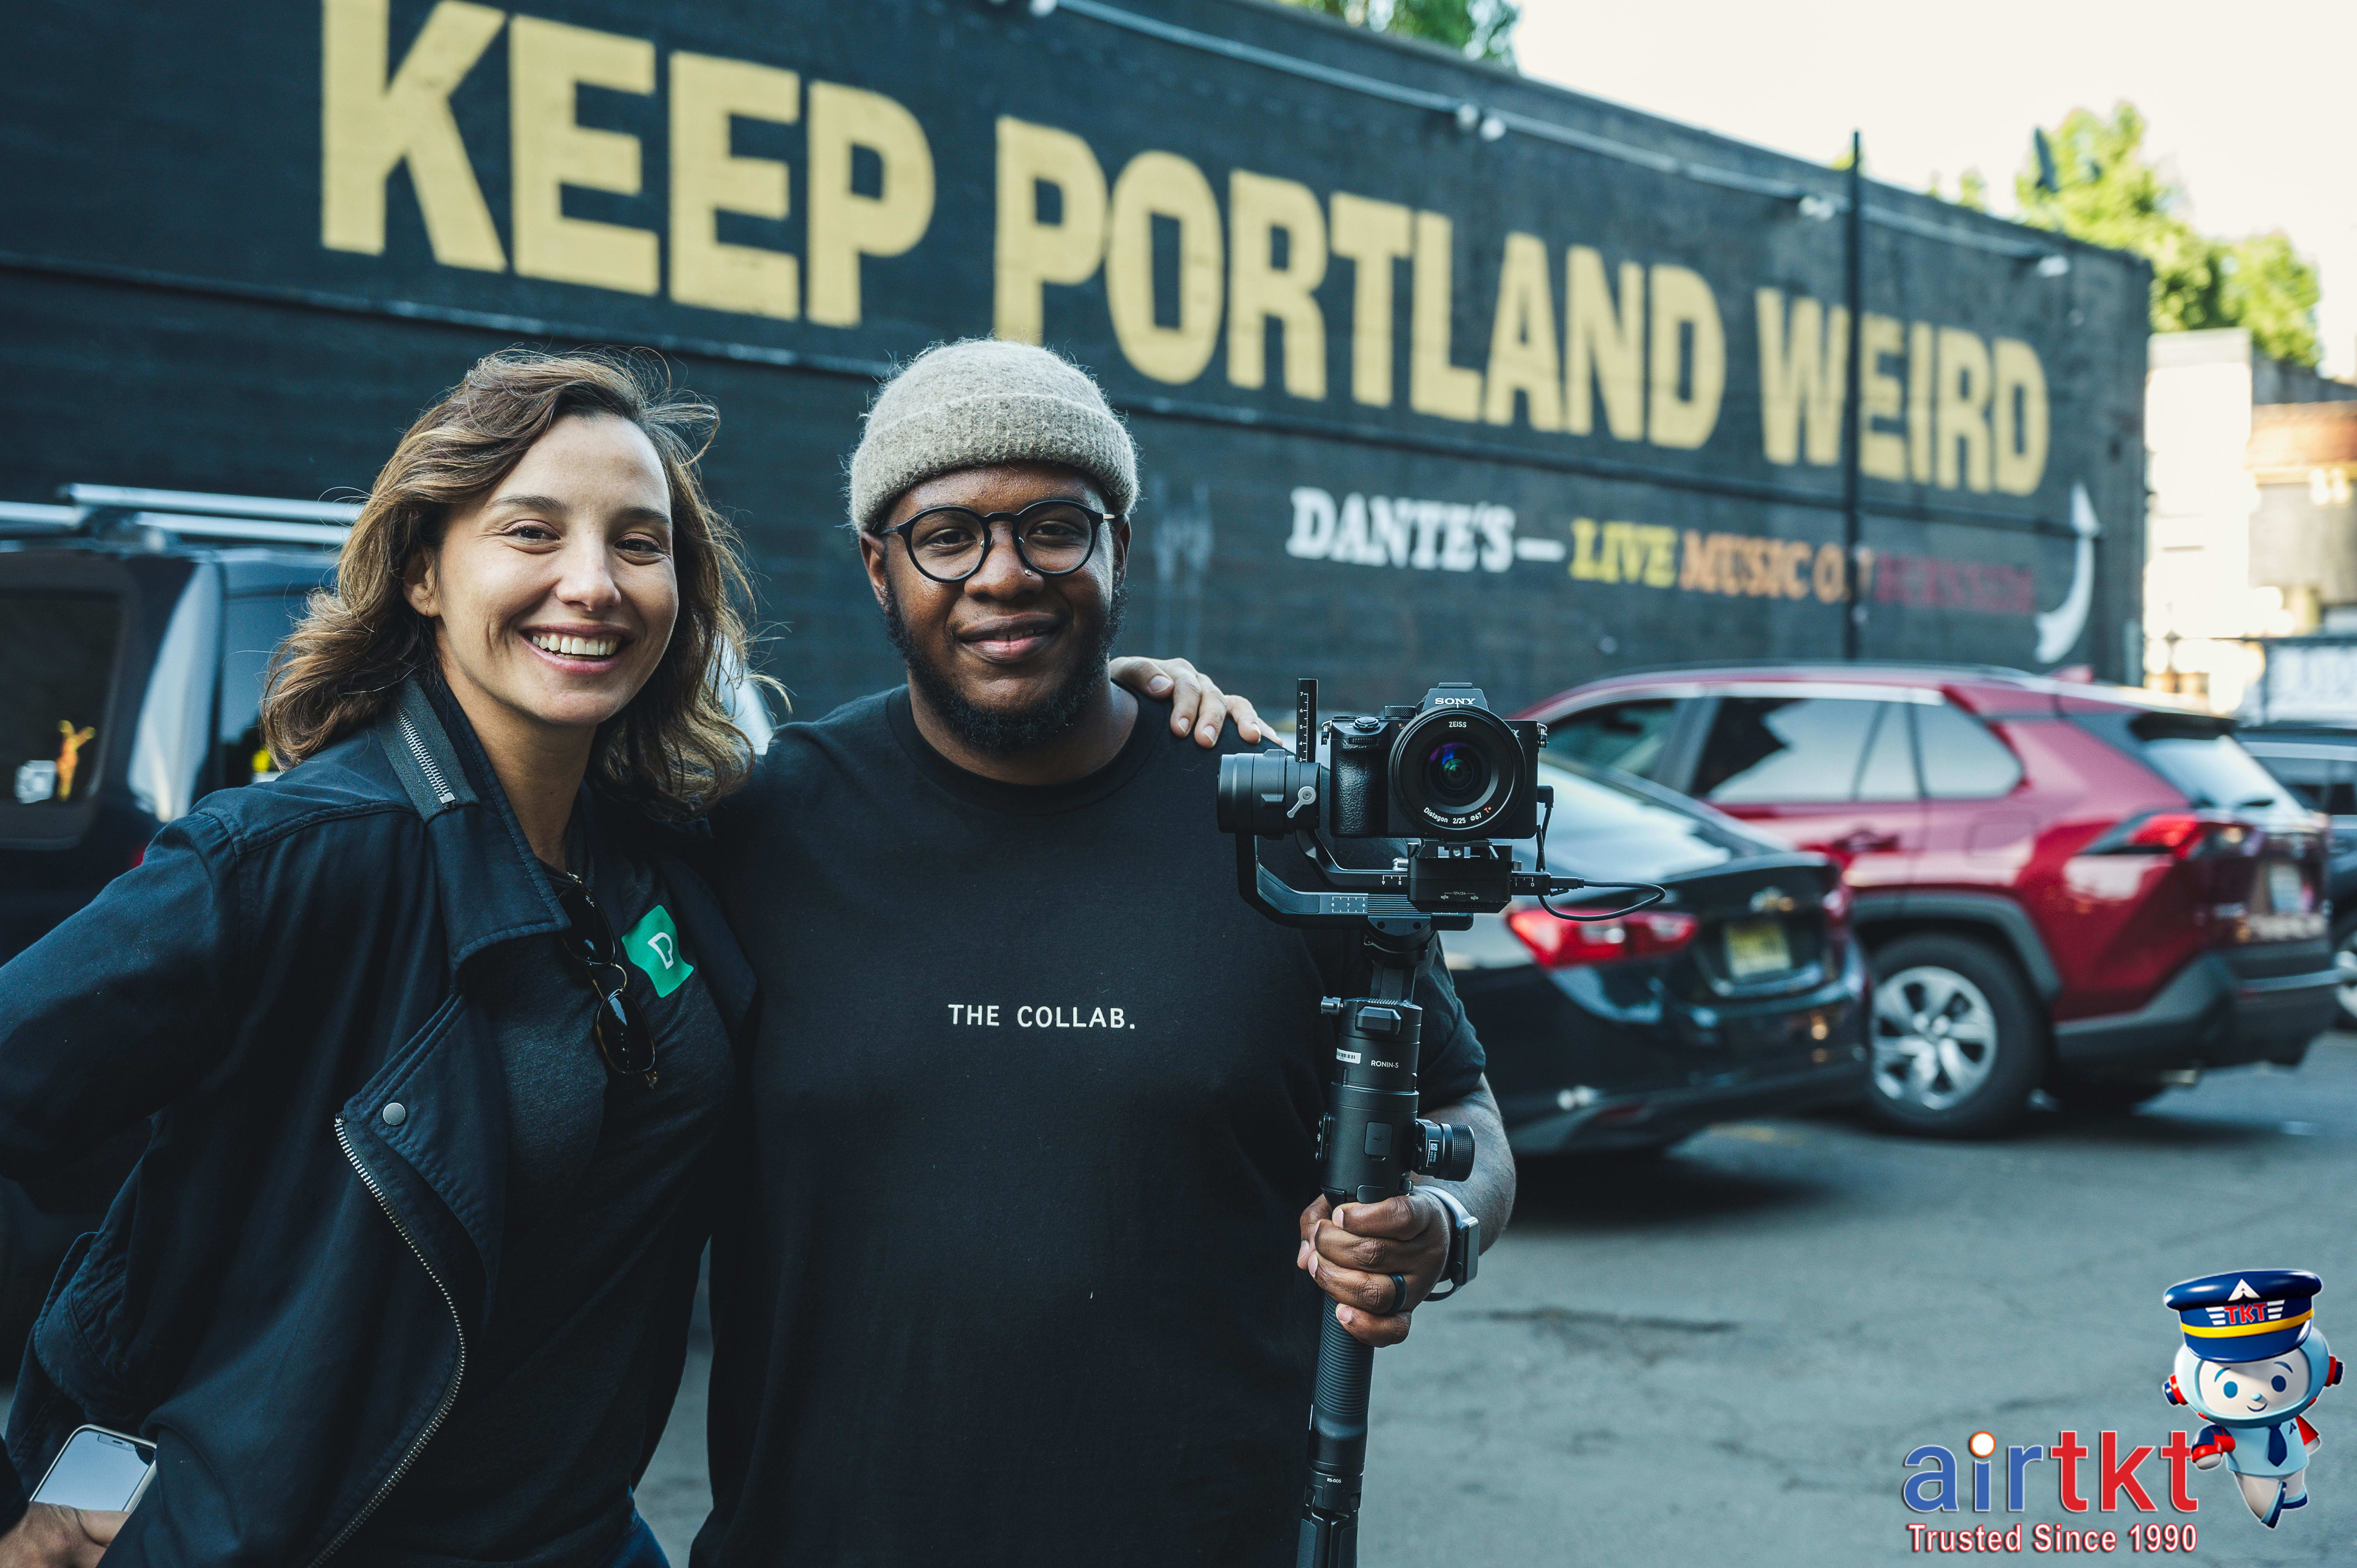
Capture Respectful Travel Portraits
When photographing locals during your travels, seeking permission is essential for capturing respectful, authentic portraits. Asking before snapping a picture shows cultural awareness and regard for personal boundaries, which enhances trust and allows deeper connection. This approach transforms simple images into meaningful stories that honor the subjects’ dignity.
Requesting consent varies across cultures, but simple politeness always works. A genuine smile, a nod, or a few basic phrases like “May I take your photo?” in the local language can open doors. In some cultures, discreet gestures or showing your camera screen to explain your intent helps. Avoid imposing; instead, patiently wait for a positive response or share your own reasons for the portrait.
Respectful interactions not only foster goodwill but yield better portraits. People tend to relax and reveal their true selves when they feel valued. This authenticity cannot be staged or rushed—inviting collaboration allows you to capture expressions filled with warmth, pride, or joy. On the other hand, snapping pictures without consent risks offending, misrepresenting, or exploiting individuals and communities.
Ethical photography means avoiding misuse of images. Always consider how your photos might be perceived or shared, especially on social media. Avoid capturing vulnerable moments without awareness or exploiting cultural symbols. Keep images truthful, respectful, and mindful of local customs. An ethically taken portrait is a gift, not a trophy.
Positive examples abound when permission is sought. For instance, tourists who took the time to talk with elders in rural villages often left with heartfelt smiles. Some travelers shared final prints to express gratitude, fostering cross-cultural friendship. These experiences enrich a journey far beyond visual souvenirs.
To keep portraits natural and comfortable, blend permission with a candid shooting style. After consent, allow subjects to move or interact naturally rather than freeze in posed stances. This approach captures spontaneous emotions and genuine gestures—elements that truly bring travel photography to life.
Experiment with Angles and Perspectives
Diversifying your travel photos is an exciting way to capture unique memories that stand out. One powerful method is experimenting with different angles and perspectives. Instead of shooting everything straight on, try shifting your viewpoint to add drama, scale, or intimacy to your images.
Start by exploring low-angle shots. Position your camera close to the ground and tilt it upward. This technique emphasizes foreground elements, like flowers, cobblestones, or textured surfaces, and makes subjects appear larger or more imposing. Low angles can transform an ordinary street scene into something dynamic and towering.
Next, seek safe elevated vantage points for fresh perspectives. Look for balconies, observation decks, or gentle hills where you can capture sweeping views. High angles compress distance and often reveal patterns, architecture, or crowds in a way that’s impossible at eye level. Always prioritize safety—avoid unstable ledges or risky climbs that could endanger yourself or your gear.
Architectural and natural features offer excellent opportunities for creative framing and layering. Use doorways, arches, tree branches, or rock formations to frame your subject. This adds depth and context, guiding viewers’ eyes through the photo. Layering foreground, middle ground, and background elements helps tell a richer story.
For balanced, relatable shots, practice eye-level compositions. Follow these steps:
- Identify your subject and position your camera at the same height.
- Focus on capturing natural expressions or interactions when photographing people.
- Use a shallow depth of field to isolate your subject if desired.
- Experiment with different crops — from tight portraits to wider environmental shots.
This straightforward perspective offers timeless appeal and creates an intimate connection with the viewer.
Changing your shooting angle can transform a simple scene dramatically. For example, a towering monument shot from below accentuates its grandeur, while a city street photographed from a balcony reveals geometric patterns of rooftops and streets. Even a casual café scene gains intimacy when captured eye-to-eye with patrons.
By consistently experimenting with angles and perspectives, you’ll develop a creative eye that captures your travels in fresh, compelling ways. For tools and booking your next trip where you can put these techniques to use, visit AirTtkt for affordable flights and seamless travel planning.
Edit Photos with Basic Tools
Capturing a great travel moment is only the first step—enhancing your photos with simple edits can elevate them to a whole new level. For beginners, user-friendly apps like Snapseed and Lightroom Mobile offer powerful tools without overwhelming interfaces. Both are available on smartphones, with Lightroom also providing robust desktop versions for those who prefer editing on a larger screen.
Start with the basics: adjusting exposure brightens or darkens your image, helping to correct underexposed or overexposed shots. Contrast tweaks the difference between highlights and shadows, making your photo pop without appearing artificial. Cropping allows you to remove distractions and focus on the subject, improving composition instantly. Lastly, simple color correction balances tones to reflect what you saw through your eyes, whether by enhancing warmth for sunsets or cooling down scenes for a refreshing vibe.
Maintaining a natural look is key. Avoid slathering on heavy filters, which can flatten your image or create unrealistic effects. Instead, aim for subtle enhancements that preserve the integrity of the scene. Sometimes a slight adjustment is all it takes to bring out hidden details or enrich colors without turning the photo into something unrecognizable.
Remember, editing is a creative part of storytelling—not a race for perfection. Each image reflects a memory, a mood, and your unique travel perspective. Subtlety can often evoke more emotion than drastic changes. Consider how the image will make viewers feel and choose edits that enhance those feelings rather than overshadow them.
By mastering basic tools, you empower yourself to craft photos that entice and inspire—whether sharing with friends or creating a travel album. Embrace editing as a fun, simple way to polish your snapshots and showcase your adventures authentically.
For travelers planning their next trip, AirTtkt offers affordable flights and travel deals, making it easier to explore and capture new moments worth enhancing.
Master Smartphone vs DSLR Settings
Choosing between a smartphone and a DSLR for travel photography depends largely on understanding their key camera settings and how they affect your photos. Smartphones today are equipped with powerful features like autofocus, exposure compensation, and HDR, simplifying the snapshot process. Autofocus ensures your subject is sharp, exposure compensation lets you brighten or darken images before snapping, and HDR (High Dynamic Range) combines multiple exposures to balance shadows and highlights brilliantly.
On the other hand, beginner DSLRs offer more manual flexibility but require grasping concepts like aperture, shutter speed, and ISO. Aperture controls the amount of light entering through the lens and affects depth of field; a lower f-number means a wider aperture with a blurrier background. Shutter speed governs how long the sensor is exposed to light—faster speeds freeze motion, while slower speeds can create motion blur. ISO determines the sensor’s sensitivity to light; too high results in grainy images, but too low requires more light.
Beginners often wonder when to use auto mode versus manual control. Smartphones largely shine when set to auto or assisted modes, making quick adjustments for you, perfect for spontaneous travel moments. DSLRs, meanwhile, offer an auto mode friendly for novices but truly unlock creative potential in manual or semi-manual modes like aperture priority, especially for landscapes or portraits where control over exposure is essential.
Each device has its advantages and limitations for travel photographers. Smartphones are compact, always at hand, and great for social media-ready shots. Their computational photography algorithms boost image quality without manual fiddling. However, limited zoom and sensor size can restrict image quality, especially in low light. DSLRs provide superior image quality, lens versatility, and more creative control but add bulk and learning curve, which can be challenging while on the move.
Some common beginner mistakes include relying exclusively on auto mode for DSLRs, resulting in missed creative opportunities, or neglecting exposure adjustments on smartphones, which may produce flat or poorly lit images. Avoid these by practicing with manual settings gradually and experimenting with exposure and focus features on your phone.
Sample Settings for Key Scenarios
- Landscape Photography: DSLR — Aperture around f/8 to f/11 for sharp depth; shutter speed varies with light; ISO 100-200 for clarity. Smartphone — Enable HDR to capture dynamic range.
- Portraits: DSLR — Aperture between f/1.8 and f/4 for blurred backgrounds; moderate shutter speed; ISO adjusted to environment. Smartphone — Use portrait mode to simulate depth effect.
- Low-light Scenes: DSLR — Higher ISO (800-1600), slower shutter speed with tripod. Smartphone — Use night mode if available; avoid digital zoom.
For more detailed smartphone photography tips and to refine your skills, check out this DPReview guide on smartphone photo basics. Understanding your gear empowers you to capture travel memories beautifully—whether in your pocket or in a camera bag.
Travel Photography FAQs
How to improve travel photos without professional gear?
Use natural light creatively, focus on interesting angles, and frame your shots carefully. Simple techniques like steadying your camera and cleaning your lens make a big difference. A good eye beats expensive gear when capturing authentic travel moments.
What is the rule of thirds in travel photography?
The rule divides your image into a 3×3 grid. Place key elements along these lines or their intersections to create balanced, dynamic photos. It helps guide the viewer’s eye naturally and makes travel images more engaging and professional-looking.
When should I shoot to get the best travel photos?
Shoot during golden hours—shortly after sunrise or before sunset—for soft, warm light that enhances colors and shadows. Early mornings also mean fewer crowds, letting you capture peaceful scenes without distractions.
Why is asking permission important in travel photography?
Respecting locals by asking permission builds trust and avoids cultural misunderstandings. It ensures you capture genuine moments ethically while honoring privacy and traditions during your travels.
Can I use my smartphone instead of a DSLR for travel pictures?
Absolutely! Modern smartphones offer impressive cameras and editing apps. They’re portable, easy to use, and excellent for spontaneous shots. Focus on composition and lighting to maximize your smartphone’s photo quality on your trip.
What editing apps are best for beginners?
Apps like Snapseed, Lightroom Mobile, and VSCO are beginner-friendly and offer powerful editing tools. They allow easy adjustments to brightness, contrast, and color without overwhelming you. Experiment with filters sparingly for natural results.
How do I avoid over-editing travel images?
Keep edits subtle—enhance colors and sharpness without altering reality. Avoid heavy filters and extreme contrast. Step back often and compare with the original to maintain your image’s natural feel and authenticity.
Enjoy Creative Travel Photography
Travel photography thrives on a blend of creativity, respect, and the right techniques. Throughout your journey, remember how vital composition and lighting are to capturing images that tell a story. Aim to find diverse perspectives that go beyond typical snapshots while honoring the people and places you photograph. Simple editing can enhance your photos but don’t get caught up chasing perfection—sometimes the best shots come from genuine moments.
Above all, prioritize making memories over curating flawless social media posts. The heart of travel photography lies in experiencing and savoring the journey, not just documenting it. This mindset helps you stay present and enjoy authentic interactions, enriching both your photographs and your travels.
To make these memorable trips happen, choose a travel partner dedicated to accessibility and affordability. AirTtkt offers competitive prices and seamless booking tools that simplify planning your adventures. With exclusive deals on flights, hotels, and car rentals, AirTtkt removes hassle and expense, allowing you to focus on exploring and photographing new experiences.
Whether you’re a seasoned traveler or venturing somewhere new, using accessible gear and thoughtful techniques transforms your travel photography into a personal art form. Trust AirTtkt to fuel your journey with affordable travel options so you can focus on the joy of discovery and creative storytelling through your camera lens.